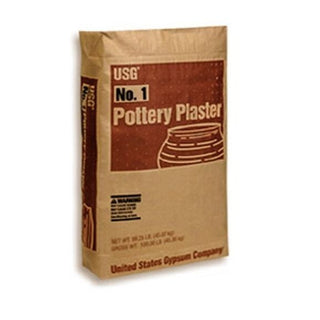
USG® No. 1 Pottery Plaster 50lb Bag
USG Pottery Plaster Mix For Wedging Tables:For wedging boards or tables mix 70 parts of water to 100 parts USG pottery plaster. This equals 4.17 gallons water per 50 pounds dry pottery plaster.
50lb Bag U.S. Gypsum Pottery Plaster Product Data
- The best material available for sanitaryware and dinnerware casting.
- Formulated for long life and reduced breakage (stronger molds).
- Available with or without thermal shock additive.
#1 POTTERY PLASTER is highly uniform, noted for outstanding performance and long life. The standard of the industry - this is the best material available for sanitaryware and dinnerware casting. Used for making plaster bats, wedging boards, and working molds. The U.S. Gypsum Pottery Plaster is a relatively soft plaster which may be used for carving.
Technical Properties
English Metric Use Consistency (parts of water by weight per 100 parts plaster ) 70 70
1 Hr. Compressive Strength 1,000 psi 6.8 MN/m2
Dry Compressive Strength 2,400 psi 16.3 MN/m2
Total Absorption Capacity 36% 36%
Maximum Setting Expansion 0.210% 0.210%
Density Wet 99.0 lb/ft3 1.58 g/cm3
Dry 69.0 lb/ft3 1.10 g/cm3
Set Time (Machine Mix)* 14-24 min. 14-24 min.
U.S. Gypsum Pottery Plaster General Directions and Guidelines
Preparing U.S. Gypsum Pottery Plaster: Use potable water at temperatures between 70° and 100° F (21° and 38° C). Since variations in slurry (the plaster and water mixture) temperature produce variations in setting time, it is important to keep both the plaster and water in a stable temperature environment prior to use. The higher the temperature of the water, the shorter the set time. Weigh both the pottery plaster and water for each mix. The water-to-plaster ratio is critical because it governs both the strength and the absorptive capacity of the mold.
Soaking Sift or strew the USG pottery plaster into water slowly and evenly. Do not drop handfuls of plaster directly into the water. Allow soaking for 1-2 minutes. The plaster should be fully dispersed in the water prior to mixing. Small batches require less soaking than large batches. See bulletin IG503 for specific soaking instructions.
Mixing Mixing the USG pottery plaster slurry is one of the most important steps in producing plaster molds with maximum strength, absorption, hardness, and other important properties.
Mechanically mixed plasters develop uniform molds with optimal strengths. Plasters can be mechanically mixed through both batch and continuous processes. Proper blade and bucket dimensions are important for obtaining the best batch mix (see IG503 for details). Longer mixing times result in higher mold strength and shorter setting times.
Pouring To prevent air entrainment and provide a uniform, smooth surface, careful pouring of the USG pottery plaster slurry is necessary. Agitation of the filled case mold is a further step used to prevent air at or near the mold surface. Whenever possible, the plaster slurry should be poured carefully in the deepest area so the slurry flows evenly across the surface of the case mold.
Pouring a large amount of slurry directly on the face of the case mold may result in slight densification of the plaster mold at the point where it strikes the surface of the case. This produces a hard spot, giving uneven absorption.
Drying All pottery molds should be dried as quickly as is safely possible after manufacture so that maximum physical properties can develop. Dry to a constant weight. The best drying rooms or ovens provide (1) uniform and rapid circulation (minimum of 15-30 fps) of air with no “dead spots” having little or no air movement, (2) equal temperatures throughout the entire area, and (3) provisions for exhausting a portion of the air while replacing it with fresh air. High humidity surrounding the drying room or oven inhibits the efficiency of the drying because the air pulled into the room is incapable of picking up much moisture from the molds. The maximum temperature at which plaster molds are safe from calcination is 120° F (49° C). With substantial free water in the mold, higher drying temperatures can be used without difficulty. As drying progresses, the temperature must be reduced to prevent calcination. The safe drying zone is in the shaded area of graph (below, right). Before removing molds from the dryer, the temperature should approach that of the area around the dryer to prevent thermal shock.
CUSTOMER REVIEWS - Q&A
Got a question about this product? Ask it here and get a response from our staff and also input from the Sheffield Pottery community!


