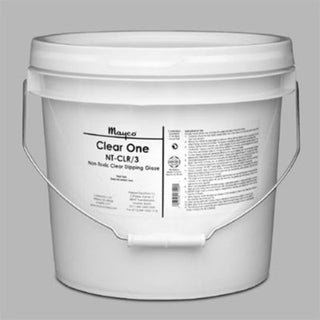
MAYCO Non-Toxic "Clear One" Dipping Glaze : 3 Gallon Pail
MAYCO Non-Toxic Clear One Dipping Glaze : 3 Gallon Pail:
To overglaze Paint your Own Pottery lowfire glazes and underglazes in classrooms and contemporary studios.
Ship weight 40 pounds
YOU MUST HAVE A VISCOSITY CUP TO ADJUST THIS GLAZE :
YOU MUST FOLLOW THESE INSTRUCTIONS TO AVOID MILKINESS :
Product Features and Attributes
Clear dipping glazes are used to completely seal bisque with a clear coating, making the ware impervious to liquids. They are also used to enhance the brilliance of decorating colors used on greenware and/or bisque.
Dipping glazes differ from brushing versions as they contain fewer organic additives, making the dipping glazes less viscous than brushing formulas. Dipping glazes allow for quick and efficient glazing on large pieces or a large number of pieces. The amount of glaze deposited on bisque is primarily a function of glaze viscosity and the amount of time the bisque is left in the glaze – careful attention to these two details are critical to obtaining satisfactory results.
Mayco’s clear dipping glazes are certified non-toxic and food safe.
Product Features, Attributes, and Application Recommendation
Application Recommendations:
- Container should be kept tightly closed when not in use. Store in a cool, dry place away from heat and vibration.
- Mixing with a power mixer is required prior to first use
(hardware/paint stores offer many drill mounted mixer attachments). Mix
for 6-8 minutes. Using a DuPont M-50 viscosity cup, check viscosity for
our recommended viscosity range:
- NT-CLR – 19-22 seconds
- S-2000 – 16-18 seconds
If glaze is too thin, remix for an additional 2-3 minutes and re-measure
the viscosity. If too thick, add distilled water in 1/2 cup increments.
Remix and retest.
- For best dipping results and operational efficiency use of a dipping
container – one that will hold between 15 and 30 gallons of glaze and
is 24” to 30” deep – is recommended.
- Color glazes applied to bisqueware should be thoroughly dry before
dipping. Do not force dry color glazes by using heated air sources (hair
dryer, heat lamp) as doing so may affect the performance of both the
color and clear glazes. Ambient temperature fans are appropriate.
- The use of protective equipment, such as an apron or smock, rubber
gloves, safety glasses or similar eyewear and shoe coverings is
recommended. DO NOT spray apply without proper personal protective
equipment.
- Using dipping tongs (or by hand, wearing latex or rubber gloves),
fully immerse the entire piece using a smooth in-and-out motion. The
duration of the dip should not exceed 1 -1 ½ seconds. Dip only once!
- Remove the bisque from the dipping glaze rotate 90° shake vigorously
2-3 times, rotating the piece as you shake, to minimize drips and runs.
Use a soft fan brush (RB-140) moistened in the dipping glaze to pat
away drips and runs and to touch up the area where the bisque was held.
- The amount of clear glaze deposited on the ware can involve many
variables, such as bisque porosity, glaze viscosity, and your dipping
mechanics. Fired results can be impacted by the amount of color glaze,
firing time and temperature. As you gain dipping experience you will
learn how to make adjustments for these variables and improve your fired
results.
- NEVER finger sand to remove drips or imperfections. Sanding can create dust, which can be harmful if inhaled.
- While dipping, re-stir the glaze as needed (15-20 minutes) to keep it fully dispersed. Measure the viscosity each time you mix.
- Clean up any spills with a damp mop or sponge to minimize the creation of harmful dust.
- Allow glaze to dry thoroughly before firing. Recommended firing is
shelf cone 06 (999°C, 1828°F). In some instances glaze clarity may be
improved by firing to shelf cone 05 (1031°C, 1888°F).
- We recommend tracking the product lot numbers as they will be needed to provide you with technical support.
USAGE VARIATIONS AND FAQ’S
- NT-CLR – 19-22 seconds
- S-2000 – 16-18 seconds
Q: What does coefficient of expansion (COE) mean and how does it impact my choices of glazes, clay or bisque?
A:
Glaze and clay/bisque bodies are both ceramic materials. During the
firing process they expand and then contract together; the rate of
expansion/contraction can be measured and mathematically stated as a
coefficient of expansion.
If the two materials are not compatible – if they expand or contract at widely varying rates – the glaze may crack or chip off the body (please understand that incompatible COE’s are only one cause for glazes to chip or crack).
Mayco strives to produce glazes that are as tolerant of as many major sources of earthenware and stoneware bodies as is feasible. We stock over 20 types of clay bodies for testing purposes and glaze and fire samples from every shipment of bisque. But there are hundreds of clay bodies in use around the world, with hundreds of color glaze and clear glaze combinations being used on these bodies.
With respect to clear glaze: if you are experiencing an inordinate amount of shivering – glaze chipping off the body – you may want to try S-2000. If you are experiencing crazing – glaze in which cracks appear – you may want to try NT-CLR.
Q: What is the proper way to use a viscosity cup?
A:
Holding the viscosity cup in one hand and a stopwatch in the other
submerge the cup into the glaze. Start the stopwatch the moment the
bottom of the cup clears the surface of the glaze. When the glaze stream
breaks, stop the clock. Cup should be empty or nearly empty.
Q: How do I dip large pieces of bisqueware?
A:
Dip two-thirds of the ware into the glaze. Dip the remaining one-third
up to the previous dip line and avoid overlapping as much as possible.
Moisten a soft fan brush (RB-140) in the dipping glaze and gently pat
the seam line. Be careful too to apply too much pressure with the brush
as you may smear the underlying colors and design.
Q: Why must distilled water be used to thin the glaze?
A: Tap water or bottled water may contain minerals and impurities that could react with the dipping glaze.
Q: Occasionally I find hard, white pellets in my clear glaze. What are they?
A:
Oolites are little pebbles of calcium carbonate. They form naturally
although the exact reasons for their formation are unclear. With respect
to clear glaze their occurrence is usually during the late summer
months – the combination of the warm temperatures and vibration the
glaze may experience during transit may factors. These materials can be
strained out of the glaze using a fine mesh sieve.
Q: How long must the clear glaze dry before it can be fired?
A:
4-5 hours at a minimum, 12 hours would be best. Hazy finishes, trapped
bubbles and crawling can occur if the clear glaze has not thoroughly
dried before firing.
Q: The fired finish appears hazy, white or bluish in
color, and/or has a surface resembling hundreds of little pores. What
can be done to obtain a clear, smooth finish?
A:
This result may be due to heavy application glaze – color and clear – or
insufficient firing temperature. Adjustments to your dipping process
may include lowering the viscosity of the glaze itself or increasing the
speed of your dipping mechanics.
Adjustments to the firing process may include slowing down the firing rate, added a 10-15 minute hold at the end of the firing cycle (computer controlled kilns), or firing hotter – to cone 05. Non toxic glazes will not move or run as much as leaded glazes; our internal testing of major brands of color and clear glazes on Chinese, Italian and US domestic bisque show that higher temperatures and fewer layers of glaze (color and clear) produce better fired results. You may want to test our findings to see if they help you achieve better fired results.
Re-firing the piece may be possible to help clear up the finish. Always use pyrometric cones, such as Orton’s self supporting witness cones, to make sure your kiln is firing to the proper temperature. Place cones on the top, middle and bottom shelves to test for even temperatures in your kiln. If you normally use cones on the middle shelf only you should do the three shelf test periodically to make sure you are getting even heating in the kiln.
Q: I find dipping tongs difficult to control and use
– especially for large pieces. What is the recommended procedure for
dipping by hand?
A: Use latex or rubber gloves to
cover your hands (primarily as a precaution against skin irritation).
Dip 98% of the piece into the dipping glaze and shake vigorously 2-3
times. Moisten a soft fan brush (RB-140) in the dipping glaze and pat
glaze onto the unglazed area (where you held the piece).
CUSTOMER REVIEWS - Q&A
Got a question about this product? Ask it here and get a response from our staff and also input from the Sheffield Pottery community!


